Category Archives: aesthetics

Shooting Snow!

Among the hardest scenes for the landscape photographer to capture, snow has to rank right up there at the top. In sunlight, a snow covered landscape exceeds the light sensitivity range of our eyes…let alone a digital camera sensor. Even in lower light levels, under overcast skies or while it is actually snowing, it is very difficult to balance exposure in camera to produce white snow with significant texture and detail, and true to life colors where color is showing. If the snow is right, everything else in the scene is dark gray to black…which is one reason so may photographers resort to black and white when shooting snow scenes.

Over the New Year’s holiday we got significant amounts of fresh snow here in southern Maine, so, of course, I was out with my camera. That first day I was out while it was actually snowing. Light levels were subdued,the sky was a dark grey blur,  and there was a lot of snow still in the air, closing horizons like fog. I was out a few hours and had a chance to reflect on the process of capturing a snowy landscape.

In subdued light, without any direct sun, I find that my camera responds best if I simply leave it on Programmed Auto. This produces a balanced exposure with enough detail in the snow so that I can bring it down and out in Lightroom, and enough color in whatever is still showing color so that I can bring it up and out.

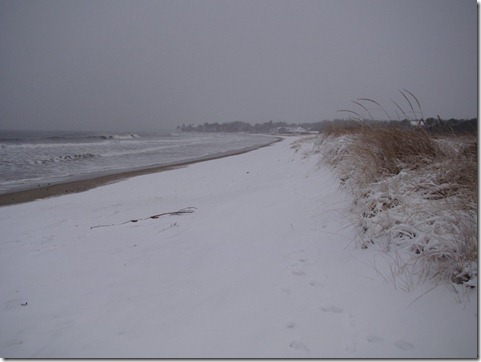
Here is a shot, just as it came from the camera (just resized for display here).

blizzard00001

As you can see, the snow is kind of gray, and there is little to no color in the beach grasses.

A trip through Lightroom results in this image.

I applied Recovery to bring out what little detail is in the snow and sky, then Fill Light for the color. The Blackpoint is shifted right, and I added Clarity (local contrast) and Vibrance (selective saturation) and finally used the Sharpen Landscape preset. I increased Contrast overall just slightly.

This image is very close to my visual impression of the scene when taken.

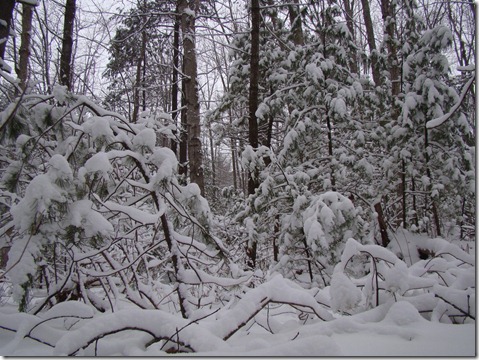
Here is another, somewhat classic shot.

blizzard00002

In camera exposure is not very spectacular…but the information is all there for post-processing.

Using almost exactly the same processing in Lightroom as the first image I was able to preserve the snow detail while bringing out the color in the evergreens.

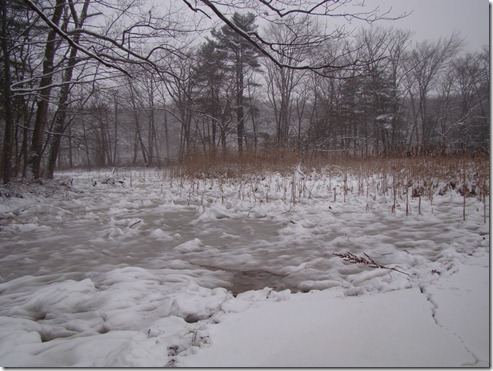
One more from the subdued light series.

blizzard00004

The differences here are more subtle but there is an increase in both snow detail and color.

The key here is that I am working with a balanced exposure, as provided by the auto exposure system in the camera, with no manipulation, then doing all my adjustments in post-processing. Of course this is only possible if you know both how your camera is going to respond to these kinds of scenes and what you are able to do in software afterwards. Both in camera exposure and post-processing are part of the creative process, and part of the envisioning of the image when it is being taken.

I can’t emphasize that enough. What you are going to be able to do in post has to be part of your exposure decision in camera.

Of course, eventually the sun does come out. It might be days later, as it was in Maine, but the sun completely transforms the exposure issue for snow covered landscape.

Most people require sunglasses to deal with sun on snow. I use a wide brimmed hat. Whatever it takes, even our unprotected eyes can be overwhelmed by the glare of light when the sun shines on snow.

If your eyes can’t handle it, there is absolutely no chance the digital sensor in our cameras can. With sun on show you really have no good choices. Either you expose for the sky and any color in the scene, and the snow goes completely white and featureless, or you expose for the snow, and everything else goes black. Even if you expose for the snow, you run the risk of getting grey snow with very few highlights, and that does not look real either. No good choices.

The usual way of dealing with snow and sun is to use Exposure Compensation. Most digital cameras, when placed in Programmed Auto mode, will allow you to shift the EV (Exposure Value) up or down by 2 points. Each 1 EV change is equivalent to doubling or halving the exposure. Some cameras have a dedicated button for this, or an easy to find menu option. Some have it buried in the menu system…though it is generally fairly near the top since it is often used.

Conventional exposure wisdom says that for sunny snow covered landscape or sun on snow details you should reduce the exposure by –.7 to –1 EV. Here are two examples of the difference that makes. Standard Programmed auto shot first then –.7EV.

Image00001

Image00002

As you see, standard Programmed Auto produces large areas of snow that is totally burned out…so white there is no detail left. It does, however, keep the dark areas in the scene reasonably exposed. Dialing down the EV to –.7 keeps more detail in the sunniest areas of snow, but casts everything else, including shadows on the snow, way too dark.

That’s okay though…we are not looking at these as finished exposures, but as starting points for post processing. The question is, with proper processing which will capture more of the detail of the natural scene?

DSC08636

This the first programmed auto image processed in Lightroom. I used heavy Recovery for the snow highlights, a touch of Fill Light for the shadows, blackpoint just to the right, added Clarity and Vibrance and Sharpen Landscape preset.

Here is the –.7 EV image processed.

Much less Recovery, though still some. Much more Fill Light for the shadows, and consequently blackpoint further right. Added Clarity and Vibrance and Sharpen Landscapes. Because the shadows are darker the blue cast common in sun on snow shots was much more pronounced in this image, so I used the selective saturation tool to desaturate just the blue of the shadows.

Which is closer to a naked eye view? Which is a better image? I prefer the second shot which started with –.7EV.

On the other hand, there is the theory that conentional auto exposure of sun on show sets the exposure too low…for the snow…and everything else goes dark while the snow looses it whiteness. This is especially true in shots of people against snow backgrounds in full sun. Here are two shots, one at 0EV and one at +.7EV

.Image00008

Image00009

As you see, the snow is white in the +EV shot and the trees look more natural. However, with processing in Lightroom, the 0EV shot (darker) still yielded the more satisfying image.

Here is an extreme.

I shot this close up of an area of intense sun on snow at –.7EV.

Image00003

Way too dark.

Processing in Lightroom, plus a little cropping, (with a good deal of desaturation of the blue shadows) gives us this.

In general I had more success processing –.7EV shots on this sunny day than I did with standard Programmed auto shots. I did not like the +EV shots.

So, what do you do if your camera does not have EV Exposure Compensation settings? Some don’t. Most do however have Scene Mode…and one of the Modes included is almost certainly Snow or Sand & Snow.

However, these Modes are based on the assumption that you are taking images of people against a snowy backdrop…they increase exposure, generally by .5 to 1EV. And that is good. For people shots or if your primary interest is objects in the foreground. For Snowy Landscapes, however, it might just be counterproductive…especially if you consider the in-camera exposure as only a starting point for post-processing. If, on the other hand, you are not going to post-process, the Snow Mode may indeed give you more satisfactory snow scenes.

Take these two shots right from the camera. The first is conventional Programmed auto and the second is Snow Mode.
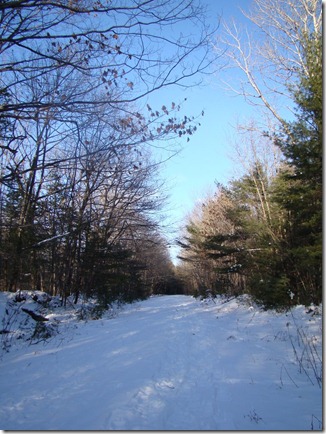
Snow00006

Snow00005The second shot looks a bit more natural to me.

Again.

Snow00003 

and

Snow00004

If I were processing these…the first in each case would make the better image, given the tools I have in Lightroom. If using them direct from the camera, however, there is no doubt that the Snow Mode does its job and produces a better snow image.

So. Let it snow. Let it show. Shoot the snow.

Just know what your camera is capable of, and what you are able to do in whatever post processing program you prefer. Expose in camera for best post.

Let it snow. Shoot snowy landscapes!

The Photogenic Moment?

North American Butterfly Gardens, Mission TX

My first Pic of the Day post

Just over a year ago I started a Pic of the Day project, sort of by accident. I was new on Twitter and Facebook at that time, and I began to post, just for fun, an image each day to TwitPics and to FaceBook. After a few days of that it occurred to me that it might be fun to make it a project, and I formalized my posting. My rules were simple: 1) any image I wanted to share, no matter when or where taken, and 2) one image per day, without missing a day.

That went on for about a month, but then it occurred to me (these things do occur if you let them) that people might like to know where and when the image was taken, how and why. For that matter, I wanted to know those things myself…when and where were matters of record (when is in the exif data, and memory generally serves for where), but the how and why mattered more to me, and I suspected would be more valuable to others…and they were much harder to pin down.

In order to share that information, I needed more space than TwitPics and Facebook allowed me, so it seemed natural to start another WordPress blog, and I did. Steve Ingraham’s Pic of the Day.

I knew from my experience here at Point and Shoot Landscape that the major beneficiary of the new blog would be me. Articulating what I have here about how I take pictures has been invaluable in helping me to refine my methods in the field…and recounting that daily, one image at a time, could only force me to learn a lot faster. I posted a brief repose on the anniversary of the Pic of the Day blog outlining some of that learning, and I will not repeat that here…but over the past few weeks I have noticed another change in my way of working which is significant and worth talking about here.

I don’t actually like to have to dip back into my archives to fill a day. I have thousands of images already posted to Flickr and Smugmug…certainly enough for several years of Pic of the Day blogs, but I don’t like to use them unless there is a particular reason. It always feels like cheating to me to go back to work I did several years ago…and certainly less interesting. I doubt, in fact that it matters to my readers, but it does to me. Occasionally, as when I was traveling in England this summer, it makes sense to me to revisit a past trip and post some of that work, as a kind of introduction the new work I hope to produce on this trip…to get both the reader and myself in the right mind-set for images of England.  That’s okay. But just dipping back because I don’t have any new work to share…well, that makes me feel just a bit guilty.

It has served as a spur, more than once this past year, to get out and take some pictures already! I am not really comfortable unless I have a week’s worth of Pic of the Days in the can…processed in Lightroom, uploaded to WideEyed InWonder  (my Smugmug site), and ready to be posted to Pic of the Day. And because of that, I have become a much more concentrated shooter on the days when I am out…and, I go out much more often with the express intent of filling my Pic of the Day stock.

Photography is not my job. I work full time, have a family to care for, other blogs to produce (Cloudy Days and Netbook Nights on cloud computing, netbook tech, and iPhone applications takes a considerable amount of my time), etc. My photography time is limited. Often only the fact that my PotD stock is running low forces me to make time for photography! It has inspired me to make time on business trips, even if it is only a few hours snatched between other obligations, and, perhaps more importantly, to shut down the computer and get outside…somewhere…anywhere…around home to find images to fill my PotD stock.

First Snow Morning

It forced me, after the first snow of the year, to find my boots and get out at sun-up. It forced me to don my winter coat and gloves and drive the miles on a frosty Saturday morning to Emmon’s Preserve the other day…just to see if there was anything there worth photographing that day.

During the Lunch break at Cloister in the Wood, Germany

It forced me, on a trip to Germany, to get outside on lunch breaks between meetings, camera in hand. It forced me to take my few rest hours in Germany between sets of meetings (I had half of a day on Sunday uncommitted) to walk the old town of Wetzlar and look for images…when I would, in many ways, much rather have been resting at my hotel. It has forced me, on Sunday mornings in Texas, when exhausted from a week of field-trips and talking to birders (my job), to leave my binos at the hotel and go look for images.

Sunday morning in Old Town Wetzlar, Germany

And, on each outing, if forces me to be productive. It forces my eyes wide open, and my imaging sense into high gear every moment I am in the field. I am looking for images. I need to bring back the bacon every chance I get, and since that Pic of the Day just does not stop, I have to bring back as many good images as I possibly can. WideEyedInWonder is apt. Only now I can’t wait for the wonder to happen to me…I have to go out looking for wonder!

And what a difference that makes. From looking for photogenic moments, I have had to turn to making every available moment photogenic. It is a matter of focus and will…of turning the skills I have developed over a lifetime in photography loose in a hyper-intentional way every moment I have. As I write this, I am realizing that, while focus and will are accurate, so is the loose in that sentence. It requires a kind of relaxing…a certain restful confidence that the images are there, that I will find them…and that my skills, always growing, will rise to the occasion of capturing any and all images that offer, when I am consciously looking for them.

“You don’t take a photograph…you make a photograph.” Ansel Adams.

Over the past year I have really learned that lesson…I need to make images for Pic of the Day…and on outing after outing…I go out and do make images.

Winter morning at Emmons Preserve, 10 miles from home

Whether it is a winter morning at Emmon’s Preserve with nothing much out of the ordinary happening, or a winter morning at the Desert Botanical Garden in Phoenix, one of the most photogenic places I know of…there are images to be found…photogenic moments to be captured. I might come back from Emmons with 10 good images (10 Pic of the Day posts!) and I might come back from the DBG with 30, but I do come back from every outing with images worth sharing. And that is a very good feeling.

Winter morning at the Desert Botanical Gardens, Phoenix AZ

Okay, so good enough for me…but what do I have to say that might help you to achieve something similar?

1) set yourself a goal. If an image a day seems too steep, try for an image a week (much less than that seems, to me at least, to be too tenuous to hold on to). Just the process of looking closely at a single image you have made every day or every week will quickly make you better at seeing images wherever you look. And, if like me, it inspires you to take (make) more images, that is all to the good!

2) relax. Begin where you are. If your camera is still on Auto, shoot on auto. If you look at my blog you will see that 90% of my images are taken on Programmed auto…without any in-camera adjustments on my part (one of the lessons I have learned from the Pic of the Day blog, by the way…I had no idea how mundane my shooting habits are until I had to write it down every day). The Programmed there might mean that adjustments are possible…it does not mean that I often make them.

3) Look for patterns…look for patterns to fill the frame of the image. Big patterns, as in a landscape, and little patterns, as in a macro. It is all about patterns. Line and form and light…the way shapes are arranged to fill frame the camera is able to capture, just a little rectangle after all, and the way the light molds the shapes with highlight and shadow. The way the colors, which are the second aspect of light, fall within the frame. You are not photographing things or people. You are capturing patterns within a frame. The things (or people) that make the patterns may be more or less important, but their importance is controlled by where you place them in the pattern you have captured (composition…rule of thirds, point-of-view, etc. See The Really Strong Suggestion of Thirds, Point of View, Shopping for Color in Old Town Albuquerque, and Lupine Lesson: Point of View). It is the pattern that will make or break the photograph. It is the pattern that the photograph is really about. (I plan a blog entry about this pattern thing soon.)

4) don’t wait for the Photogenic moments…go out and find them…better yet, go out and make them. Pattern: line and form, light and shadow and color…pattern is everywhere. There are no unphotogenic moments. Photogenic is not, when it comes right down to it, an attribute of the world you are part of (though we generally use it that way)…it is, in reality, an attribute of your soul, your mind, your spirit…of the person you are in the world. You make the photograph. It is your eyes that find the patterns. Your hands that hold and point the camera. Your finger that fires the shutter. It is all you…all in you…trust your photogenic soul, feed your photogenic soul, fill your photogenic soul. Go wide-eyed in wonder and the whole world is full of wonder! If I did not know that before, I certainly have learned it through the Pic of the Day blog…and learned to trust it implicitly.

So, here’s a deal for you. If any of you are inspired to start a Pic of the Day, or Pic of the Week blog, I promise to visit every day/week and look at your work. Promise. And I will make, as often as possible, comments. How’s that for a deal? But you have to be faithful. A Pic of the Day blog means every day…never fail. Pic of the Week, ditto.

Photogenic moments? I am eager to see what moments you make.

Bend in the stream of time: photogenic moments around every bend...

No Such Thing as a Bad Photograhpy Day at Point Lobos

Off North Point and Cypress Grove

Off North Point and Cypress Grove

I visited Point Lobos the same weekend, two years in a row. The first time, a year ago, it was a clear morning. I got there just as the park opened, and stayed until early afternoon when the fog rolled in. This year, I was late, as I stopped on the way down to PhotoScope Sea-Otters and Curlews at Moss Landing.

http://weiw.lightshedder.com/Landscape-Wildlife/Monterey-Bay-09/9763798_iaHWP/1/#662908100_TLDUX-A-LB

North Point from Sealion Point trail.

North Point from Sealion Point trail.

I got to Point Lobos about 10:30, and the fog was already rolling across the headlands. But still, there is no such thing as a bad day for photography at Point Lobos. The light may be different. The mood changes with the weather. But the cliffs and coves, the headlands and inlets, the coastline and the trees, are always spectacular.

Hidden Beach: one of my new discoveries from this year

Hidden Beach: one of my new discoveries from this year

This year I walked some trails I had not walked last year, and discovered some new beaches and coves along the center section of the coastline. I was amazed. And I revisited all my favorite spots from last year, often taking very similar images…the vantage points along much of the coast are limited by the trails and wire trial guides…you can only stand where they let you stand unless you are the kind to break the rules and trample fragile vegitation. I am not. I stood where expected and took the expected shots…except that they were, of course, completely different than those I took a year ago.

Splender in the Weeds

Splender in the Weeds

The fog added mood and mystery to what had been sun-lit and bold last time. The horizon was closed off just beyond the points. Coves were walled in on the sea side. Colors were subtle and softer. It made the small details close by all the more interesting. It was great!

Down at Beach level in China Cove

Down at Beach level in China Cove

This year the stairway down to China Cove Beach was open again (last year the bottom half had been torn away by a storm). I love China Cove, and this was a whole new view.

China Cove from Above: stood here last year...this years image is different!

China Cove from Above: stood here last year...this year's image is different!

But then, as I say, I can’t imagine any weather, any day, that would not be a good day for photography along this amazing section of coast.

I could have taken these same shots with a full bag of DSLR gear, and they might have marginally better, but the ease of carrying the advanced P&S (Sony DCS H50) somehow keeps me more in the experience…more focused on the sights and sounds of the place…the physical sensations…that I might be while doing serious photography with a full DSLR kit. It allows me to do satisfying photography without being completely focused on photography. That is what I like about P&S.

Bluefish Cove from the trail above Whalers Cove

Bluefish Cove from the trail above Whaler's Cove

When the fog got really heavy shortly after noon, I packed up and headed out of the park. It seemed a shame not to see what Whaler’s Cove was like on my way past, and I discovered another whole world. The fog had not reached that far into bay yet and it was all bright sun there. Another mood…almost another world.

The Wall of China Cove

The Wall of China Cove

You can compare the images from this year with last year’s take at my Point Lobos gallery on Wide Eyed in Wonder. Many more from this year’s visit are near the center of the Monterey Bay 09 gallery (or you can get to the gallery by clicking any of the images above, and then clicking the larger image to go to the gallery behind it).

There is no such thing as a bad photo day at Point Lobos.

Another from China Bay Beach

Another from China Bay Beach

To Blur or Not to Blur: moving water?

Silky Water and Solid Rock

Silky Water and Solid Rock

Classic shot. Rushing stream singing around rocks between deeply shaded, moss covered, banks with rugged tree trunks framing. The photographer set his tripod mounted camera to the slowest speed possible so that the water appears in the image as a silky blur, fog-like, wrapping itself around the solid rocks. If the light is too intense to allow for a shutter speed slow enough to blur the water, the photographer has used a neutral density filter to cut the light, and force the shutter speed down.

You have seen the results: thousands of times. It is a classic shot.

So, of course, I am here to challenge the conventional wisdom. Is the silky blur of water kissing rock always the best way to capture the energy of the rapids or the fall? How do you catch the music, be it a gentle melody, or a shouting Beethovean symphony, of the brook or river?

The shot above was taken at 1/6th of a second.

Here is the same shot above taken with a faster shutter speed: 1/40th, still not motion stopping fast, but all the light would allow.

Not so Silky Water Kissing Solid Stone

Not so Silky Water Kissing Solid Stone

There is still a little blur to the water, but it has lost its silkiness. My question is, which captures the motion and energy of the water better?

I suspect that we have been somewhat conditioned to see the silky water shot as the better representation of moving water. My problem with it, if I have a problem, is that it is totally artificial. It is an artifact of the photographic process, not an aspect of reality. The water blurs because it is moving too fast for the shutter speed, but it never moves too fast for our eyes! When we look at the same scene in real time, we see every splash and sputter and spray, every cascading, churning, turning, twisting, flying, fraying fabulous play of water and light and rock. We see a always changing, never still, living substance that amazes the mind and leaves us almost literally breathless. At least that is the effect a rapid or a fall has on me. Always.

And I am not sure the silky water treatment captures that energy?

Of course I am not sure the motion stopped image does it any better.

Two more:

Water Head

Water Head

At 1/13th second.

Water Head 2

Water Head 2

at 1/60th sec.

Or consider this, taken at 1/1000th sec.

Churn

Churn

Of course, like most questions of aesthetics, there probably is not a right and wrong answer here, and certainly there is no answer that can be true in all situations, for all people.

Perhaps it is enough to be aware that there are alternatives to the silky water shot. The search for a way to convey the energy and music of moving water is far from over. Be a pioneer explorer, not a settler with all your photographic baggage in the wagon you call a camera bag.

At least that is what I think. I would be very interested in hearing what you all think. Comment fields below.