Photomatix Light HDR

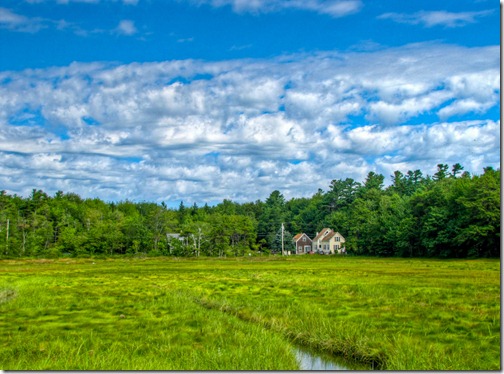
Mousam River HDR

One day, just as my experiments with multiple exposure High Dynamic Range imaging on the iPhone (using Pro HDR) were taking hold, I found myself face to face with a landscape suitable for HDR treatment…and no iPhone in my pocket! It was charging at home and I had forgotten to pick it up on the way out the door.

But I did have, of course, my Canon SX20IS. Surely I thought, there must be software that is a easy to use on the PC, after the fact, as Pro HDR is to use on the iPhone. It should then, just be a matter of taking multiple exposures and dealing with them at home. So I tried both manually adjusting exposure between shots using the Exposure Compensation dial on the SX20IS, and using the auto bracket function, which captures three exposures, on each 1EV either side of metered.

Research when I got home turned up a couple of possibilities for software and I downloaded trail copies. Of them, the one that showed most promise was Photomatix Light (that is the lite version of Photomatix…remember I was looking for something as easy as Pro HDR on the iPhone). I found a discount coupon on a review site, and bought a copy.

Maybe a few words about what HDR software attempts to do might help. The range of tones (levels of brightness, both in an absolute sense (as in black and white), and in any given color) visible to the human eye is much greater than the range of tones that can be captured by the best digital sensor. We call the range of tones that can be seen or captured the dynamic range of the medium. In a normally exposed landscape, taken on a sensor with limited dynamic range…especially a landscape with dramatic sky and a full play of light and shadow…a normally exposed image will leave the sky too pale with all the detail burned out of any clouds, and the shadows too dark…so dark you loose all color in the  darker shades of green and red (in particular).

Bosque del Apache NWR HDR

You could, of course, take three (or more) exposures: 1) one for shadow detail and color, 2) one for the more usual midrange tones, 3) and one for the highlights and sky. HDR software allows you to digitally combine those three exposures into a single exposure…using data from  the 1st for shadows, data from  the 2nd for mid-range, and data from  the 3rd for highlights. The trick with this method is to get the three images perfectly aligned, so all the edges in the three images overlap perfectly…otherwise you get ghosting along the edges of things. This can be a real problem on a windy day when dealing with foreground foliage and plants…and, of course, makes HDRs of any moving object or subject…including people…impossible.

(Advocates of DSLRs and RAW shooting will tell you that HDR is less necessary with larger sensors (which should have more inherent dynamic range) and more effective with RAW files. I would not know. I work with a P&S and JPEG and am satisfied with the results 🙂

So far so good. The fact is however, that that data in the HDR image still has to be displayed in some form, on your computer monitor or as a print…and both you monitor and your printer also have limited dynamic range…and, what is worse, the distribution of tones within the dynamic range of your monitor or your printer is different than the distribution of tones in the eye or your sensor. An HDR file that is displayed or printed will look curiously flat, as its extended data is recompressed into the range of the display medium, and the tones you worked hard to catpure are clipped off at either end.

New Jersey Foliage HDR

You can overcome this failing somewhat by mapping the tones of the HDR file on into the dynamic range of the display medium…in effect, choosing where each tone in the image will fall within the dynamic range of the display medium.  Mapping involves adjusting the local contrast between tones (both absolute and color) that fall close to each other within the dynamic range. This has the effect of making details within the final image pop out more. You can also fit the true black and true white points back into the display medium’s dynamic range (instead of letting them be clipped off at either end), and you can add intensity and vibrance to all the colors by increasing their saturation and luminance. You can also use Tone-mapping controls to shift the center brightness of the image toward light or dark (which can alter the look of the image dramatically)…or even to apply somewhat directional lighting effects by manipulating the offset of local contrast around highlights and shadows within the final image. It sounds harder than it is. In most HDR software, tone-mapping is done (and in general terms, is best done) by eye, using slider controls which show changes on a rough preview image in real time.

Bosque Watchers HDR

It is the tone-mapping features of HDR software that lead, in my opinion, to the overbaked, unrealistic, surrealistic look of much of the HDR work you see published, for instance, on Flickr (kind of like a bad painting). That does not mean, however, that judicious use of Tone-mapping will not improve almost any HDR shot.

Returning to Photomatix Light, it is not, in fact, as easy or as automatic as Pro HDR on the iPhone, but it is close enough…it does a pretty good job of auto-aligning your exposures and a pretty good job of  blending them (see below). It gives you too blending options: standard exposure blending and exposure blending with tone-mapping for detail enhancement. (Pro HDR on the iPhone only provides the Tone-mapped option…since that is, in fact, what most people think of as HDR anyway.) Photomatix will take up to 3 exposures, though it works with 2 (you can even use Tone-mapping with a single exposure for an HDR-like effect).

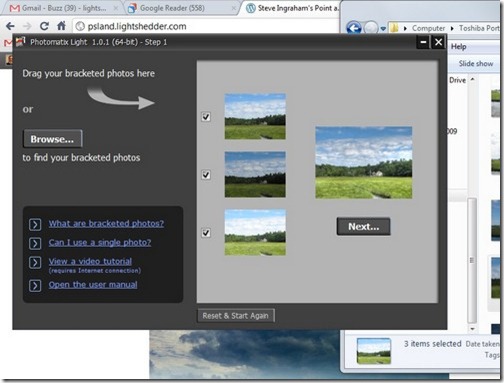
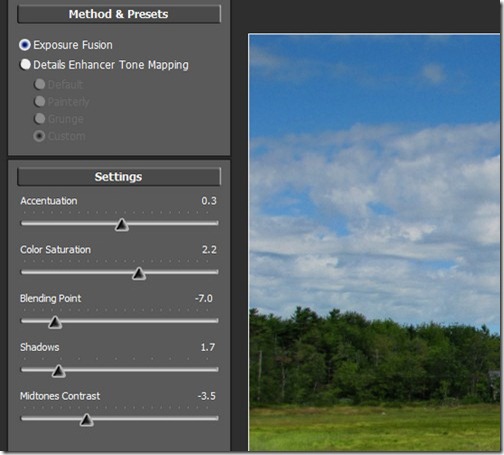
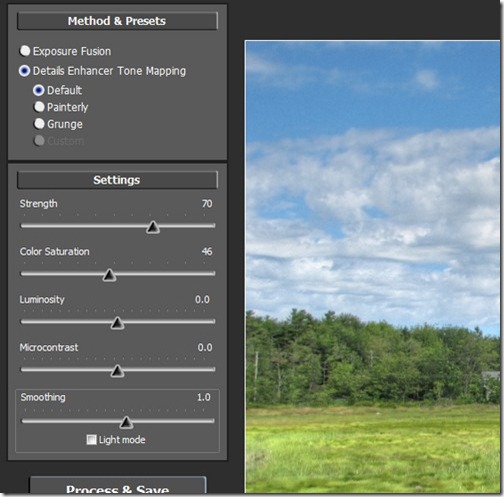
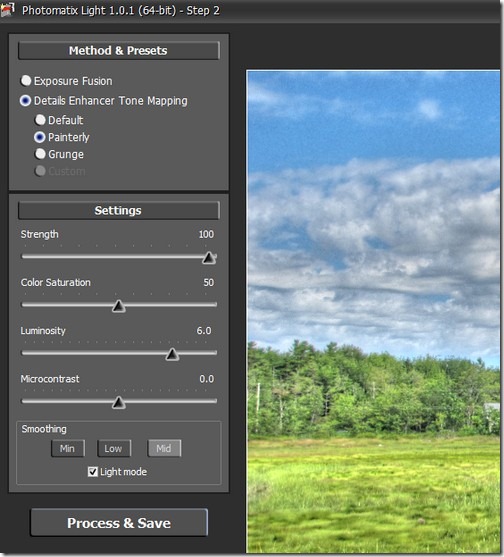
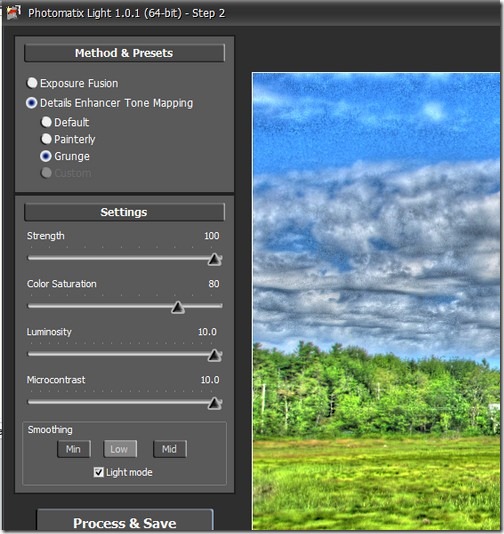
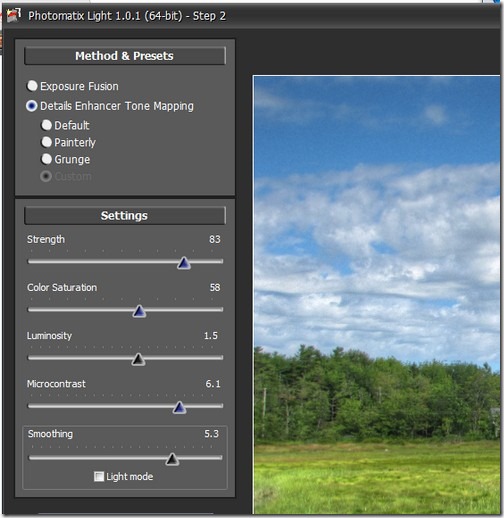
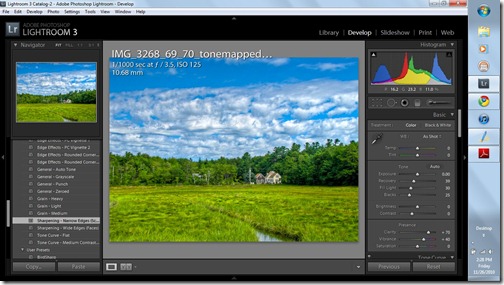
The Tone-mapping controls are particularly effective and easy to use. You can choose from one of three defaults: Default, Painterly, and Grunge…or you can adjust the controls by eye to your taste. I use custom settings most of the time, and adjust with final processing in Lightroom in mind. See screen shots. (All these can be enlarged by clicking on the image. You will have to do that on the Lightroom settings screen shot to see the settings.)
IMG_3268nor

Normally metered exposure.

Select

Three exposures auto bracketed 1EV either side of normal. You can use the file selector or drag and drop.

Blend

Blended Exposure

Default

Default Details Enhancer Tone Mapping

Painterly

Painterly Tone-mapping

grung
Grunge: unfortunately this is the effect you see most often labeled as HDR. Not a good representation of the real potential, imho.
custom

My own custom settings for this image…with Lightroom processing in mind.

IMG_3268_69_70_tonemapped2

As the image comes from Photomatix.

lightroom

My Lightroom settings: click to enlarge for a better view.

LightroomIm

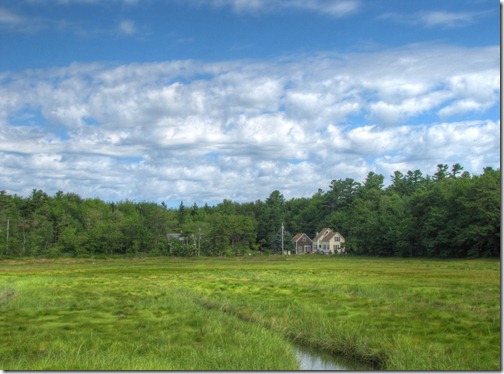
Final image…

Where Photomatix Light shows its limits is in an occasional failure to align the three images perfectly. It also has some issues with layering over gray sky. It sometimes leaves a light halo behind and around silhouetted branches and foliage, or shows different sky tones on one side of tree that breaks the horizon than on the other. (Though you should not judge this too critically by the preview image…the final image is always better aligned and blended than the preview.)

I have found that with my SX20IS, on daylight landscapes, adjusting the Exposure Compensation dial to –2/3 EV before taking the bracketed shots gives better results. EV compensation moves all three exposures by the selected amount.  For sunset shots or particularly dull days, I have also adjusted the Exposure Compensation to the plus side and gotten better results. You have to experiment.

Finally, I don’t find the Light features of Photomatix all that useful. If you look at the Painterly and Grunge preset screen shots above you will see that the Light Mode is selected in each case, with Mid chosen for Painterly and Low for Grunge. I find that the Light modes almost always result in an unrealistic image…not to my taste (though it might be to yours).

These days I shoot an HDR version of a landscape often enough so I have my bracketing and exposure settings programmed into the SX20IS’s Custom dial setting.

All my HDRs, by the way, are taken without a tripod, relying on a steady hand and the Canon’s Image Stabilization.

So, HDR with Photomatix Light is easy and effective. You might want to give it a try.

HDR Pano: 4 sets of 3 exposures, Photomatix, Photoshop Elements Pano tool, and final processing in Lightroom. View it as large as you can by clicking the image.

A New Kind of Point and Shoot: iPhone 4

It had to come to this, of course. My new iPhone has a 5mp camera with a back-illumined, low-noise, high sensitivity CMOS sensor, auto focus and auto exposure (or you can select the focus and exposure point with a tap), and, by all appearances, a pretty good, maybe even and excellent, lens. It is, in every sense of the words, much more camera then my first digital camera, a 2.1 mp Olympus that I bought in 2001 for over $500 (well, every sense of the words except for the 3x zoom).

Couple a decent digital camera with the on-board processing power of the iPhone and its available apps…conservatively a more powerful computer than my first Mac Classic by a factor of several hundreds…and you have a whole new kind of Point and Shoot photography: a camera with built in post-processing.

This is going to be a joint post, with mini reviews of the applications appearing in due course on my Cloudy Days and Netbook Nights blog, for those who are more interested in the technology behind the images. In this post, I am mostly going to talk about (and demonstrate) some of the new potentials the iPhone 4 brings to the photographer.

Let me say that some of these potentials are beginning to appear in some Point and Shoot cameras on a more limited scale. No P&S yet has the processing power to do what the iPhone does with ease…but I expect that in the not to distant future (if you are in the mood for prognostication), we will see P&Ss with all these capabilities. Two of the main potentials of the iPhone are already incorporated in some Sony offerings. Sweep panorama does the iPhone’s panorama potential one better, in some ways, and Sony is already stacking images taken at different exposures for in-camera HDR (extended dynamic range) images…though they seem to limit it so far to low light situations.

HDR: Pro HDR app


The three images showcased so far are examples of HDR photography on the iPhone 4. All three were produced completely on the iPhone (in fact, they were even uploaded to my SmugMug site directly from the iPhone). All are linked back to Wide Eyed In Wonder if you want to study larger versions.

The iPhone app is Pro HDR. Open the app. Choose HDR Camera on the splash screen. Point the phone at your scene. Tap the image once in a bright area (generally sky and clouds) and then take the picture. Tap the image again in a dark area (generally foreground landscape) and take a second picture. The app then takes the two images and combines the sky tones from one with the landscape tones from the other (or the light tones from one with the dark tones of the other), aligning and rotating if needed (in case your hand was not perfectly steady holding the camera for the two exposures) and produces a HDR image like the ones above. The image is displayed over a set of sliders that allow you to adjust brightness, contrast, saturation, and warmth (color temperature or white balance), so you can fine-tune the result. You then have the option of saving your HDR image to your Camera Roll (the originals are also saved if you set the app to do that in Settings), or emailing a smaller version to yourself or directly to a photo site on the web that takes email posts, like Posterous or Facebook.

An unintentional benefit of Pro HDR is that tapping far and near for exposure also focus the camera far and near, so that the finished image has a much greater depth of field than normal. If you take a look at the images above, or the one below, you will see that there is amazing detail from the bottom of the frame all the way to the top.

A lot of today’s HDR work really turns me off…I find it overdone and unrealistic…not just painterly…but verging on cartoonish. A caricature of the scene, so to speak, rather than a faithful rendering of any reality I have ever seen. Pro HDR, on the other hand, produces an image which to my eye is almost perfectly balanced…an amazingly realistic rendering of what I see with my naked eye…all the drama, and yet all the subtlety still intact.

Generally I don’t leave the Pro HDR image as it is. To my eye, it can always use a little sharpening and some color adjustment. I open the saved images in PhotoGene, which is kind of like Lightroom for the iPhone, and make final adjustments. I might straighten the horizon (dead simple in PhotoGene…just slide the straighten slider). I generally, as I said, use the sharpen filter. Finally, for most landscapes I use the RGB controls to pull back the red channel a bit and bring up the greens. (Much more effective than trying to adjust warmth in the Pro HDR app itself.)

Take a look at the full range of tones in that last shot. Notice the transparency of the water and the way the bottom of the stream shows through where the sky is not reflected in the foreground. Notice the detail in the marsh grasses and the range of subtle shades. And the sky is near perfect…as good as I have ever captured with any camera. And it went directly from the iPhone to my Wide Eyed In Wonder SmugMug site via SmugShot.

This final HDR is an example of yet another iPhone app: Foto FX from Tiffin. It was captured and processed in Pro HDR, and then received additional processing in PhotoGene, which included a crop at the top. However the largely featureless sky was still too bright to my eye, so I opened it in Foto FX and applied a .6 Graduated Neutral Density filter. Foto FX has hundreds of effects and filters, and I can not honestly say that I have even scratched the surface. I bought it specifically for the Graduated ND filters and those are the only ones I have used yet. The ND filters are graded, as above, by degree, but each one has a brightness slider that allows for a lot of adjustment. In this case, the .6 GND set to brightness 2 added just enough density to the upper sky to balance the landscape to my eye.

Now you might be thinking that all of this could have been done (maybe even better)  with a conventional camera and software on your desk or laptop. Of course it could have. However, the total cost of all the apps mentioned so far is less than $10. Compare that to a copy of an HDR program for the desktop, or Lightroom, or a complex after-effects program with the capabilities of FotoFX.

Then too, having all this potential literally in your pocket at all times, and at your fingertips in seconds, physically wrapped around the camera, and ready to instantly publish, only makes what I have always said about post-processing even more evident. Post-processing, rightly seen, is part of the creative process and stretches back even before the press of the shutter to where you are still looking for images. Knowing all the potential of the camera/computer in your pocket changes the way you see the world, as well as the way you capture images.

I took most of the images above simply because I could…that is to say…in a very real sense…I think I saw them because I knew I had the tools in my pocket to capture and process them to a faithful rendition of what I saw.  I might not of attempted the images without those tools.

And the availability of the all that power at low cost to any one who owns an iPhone, plus the potential of having the camera and computer always with you, wherever you go (it is your phone after all) will, I predict, cause a flood of new images like we have seldom seen before.

The iPhone 3G was already the most uploaded camera on Flickr by a good margin. The iPhone 4 stands to surpass it by far. And sites and communities like Eye’em (eyeem.com), dedicated to nothing but mobile photography, will only accelerate the process.

And I am only half done!

Panoramas: AutoStitch on the iPhone.

What if there were a camera that just let you take roughly overlapping images, in whatever pattern you like, vertical, horizontal, of any combination of the two, and then it would automatically assemble them into a panorama…and do a better job of blending the images than any desktop program you might have tried. Well…there’s an app for that…on the iPhone…so I guess you have to say there is such a camera already!

This is 8 images, 4 horizontal by 2 vertical. View it as large as you like.

This is 10 images: 5 x2. Notice that stacking the images 2 deep makes them look less like panoramas and more like just a super wide, natural view. Also, since the upper set are metered off the sky, and the lower set are metered off the landscape, the blended exposure approaches that of an HDR.

And finally, as an example of a fully processed, more panorama-like, image…

…12 individual iPhone shtos: 12 x 1, representing over 220 degrees of sweep, taken from the same spot as the forth HDR above (so you can easily compare the field of view).

It is hard to imagine how easy these are to do on the iPhone. No complex framing. Just make sure there is a fair amount of overlap image to image, and trust the AutoStitch app to do the cut and paste, rotate and blend. No complex exposure calculations or considerations. Just let the auto exposure work and trust the app to blend exposures to best effect. And because you have to hold the iPhone out at fair distance from your face to see what you are doing, the camera follows an almost perfect photographic arc that maintains natural perspective image to image, so that the result flows together perfectly. AutoStitch will auto-crop the finished panorama to a rectangle, and then you can save it to your Camera roll.

I generally have to straighten the horizon so I often leave he cropping until I have the image open in PhotoGene. I also apply the Sharpen filer, and generally adjust levels for better exposure of both sky and landscape. The last pano is an example where, since it is only one layer, the foreground was too dark…normal levels adjustment for the foreground would have burned out the whites in the clouds and washed out the blue. I resorted again to a Graduated Neutral Density Filter in FotoFx to darken the sky enough so that I could reopen the image in PhotoGene for one more pass at levels, exposure, contrast, and saturation for the final image. All on the iPhone.

For more detail on Pro HDR, AutoStitch, PhotoGene, and FotoFX, keep your eye on Cloudy Days and Netbook Nights. To follow my progress with iPhone 4 photography, check into my iPhone HDR and Pano gallery on Wide Eyed in Wonder every once in a while, or follow my Pic of the Day blog.

The iPhone 4 is an amazing piece of equipment…an amazing camera…an amazing computer. The potential for expanded photographic range hints at a whole new world of possibilities to come. And it is right there, all the time, in your pocket. Point and Shoot at its very best!

IMG_1157

P&S for Wildlife: Digiscoped Video

(This is a parallel post from the blog I write for Carl Zeiss Sports Optics at zeisssports.wordpress.com.)

It is getting so you can’t buy a digital camera (exaggeration 🙂 ) that does not have at least 1280×720 HD video capture, or 720HD as they are calling it. And full HD, 1920×1080 (1080HD) is becoming available on an increasing number of Point and Shoot digital cameras (P&Ss) and Digital Single Lens Reflexes (DSLRs) or the growing new class of Interchangeable Lens Electronic Viewfinder cameras (ILEVs). The day when you carried a dedicated camcorder for video, and a dedicated digital still camera for stills, is rapidly passing.

Of course, dedicated camcorders used to the the exclusive home of super-long range zooms: 1-20, 1-30, 1-60x even, and though HD camcorders have tended to be more modest (due to the larger sensor chips required), if you wanted super-telephoto a camcorder was the way to go.

That is changing too. The latest super-zoom P&Ss from all the major makers feature zooms in the 20-30x range, and HD video: and those zooms are long enough for larger birds and closer distances…and certainly large enough for most larger wildlife. And, of course, if you are going to digiscope your video (that is…use a digital camera behind the eyepiece of a spotting scope), all you need is a 3x zoom, even for birds…in fact, all you want is a 3x zoom, if you intend to totally avoid vignetting issues with most spotting scope eyepieces.

There’s the rub, as Shakespeare would say. A recent survey of P&Ss with 720HD video showed none with 3x zooms, few with 4x, and most with 5x or higher. Both 4x and 5x zooms on at least some of today’s P&S cameras can be used behind the eyepiece, especially if they start at a wide-angle: anything below 35mm equivalent seems to work, and most below 28mm are sure to work. You do lose the bottom third (at least) of your zoom range…either on the camera zoom or on the scope zoom. 5x zooms can lose as much as half of the zoom range. Shop carefully and you can bring home a P&S that provides unvignetted fields for HD video from equivalent focal lengths of 1500 to 5000mm behind a suitable scope zoom eyepiece.

And, if you are into digiscoping with a DSLR or ILEV, with a fixed focal length lens behind the eyepiece, or mounted directly on the scope with a Photo Adapter (available for most high quality scopes, though technically this is not digiscoping), then there is no reason not to get a body that does HD video. I mean, why would you?

A digiscoper said recently, and I wish I could find the quotation so I could attribute it properly, that while still shots might have an esthetic edge, there is nothing like video to bring the bird (or any wildlife) to life. Especially an HD video, which can be as crisp and clear as the best cinematic film shots of a few years ago, takes you right into the world of whatever you are observing, just like the live view through a spotting scope does. Video closes the loop of image capture…giving you something very close to the real time experience of using your scope in the field.

I guarantee if you try it you will be hooked.

After experimenting with marginal solutions, I recently bought a little $250 Canon Digital Elph with 720HD video (more on that here). It requires a sturdy tripod, a windless day, a steady hand (and/or a cable release), but the results can be stunning.

Take this little clip of a Chipmunk posing nicely. I featured the still as this weeks Digiscoped Pic of the Week. Catching the video was as easy as flicking the switch on the camera from still to video, zooming back a bit (the HD video frame is narrower, top to bottom, than the still image frame) and pressing the shutter release.

This is two clips of a Song Sparrow tacked together using Nero Vision software. If your computer speakers are up to it, you can hear the CD quality sound that you can catch on a still day. Earphones will really impress, but then you will also hear me breathing (I have to come up with a solution for that!)  For the second clip, I stopped the video, zoomed the eyepiece of the scope up, reframed slightly, and restarted. This is about as intimate view of a Song Sparrow singing as you are likely to see, anywhere.

And remember, this was done with a 65mm spotting scope (relatively light weight) and a $250 P&S. Not bad. Not bad at all!

A quick search around the web will turn up an increasing number of digiscoped videos of birds. And you will only see more, and undoubtedly better, as time goes on, as more cameras become available, and as more digiscopers get hooked on video.

If you want to experiment, go for it. Be warned though. The same folks who willing submit to viewing your digiscoped images of birds, and even ooo and aaaa appropriately, may show a decided lack of patience with even your best video. They will look at a still for 30 seconds, but present them with 30 seconds of video and they shut down. Any longer than 30 seconds and you risk your friendship. ?? Or that is my experience. So far. Maybe it is a comment on my video skills, and maybe I just know the wrong people, but I suspect that video is a much harder medium to get people to engage with, at least in short clips. I have yet to string together a feature length film (maybe 3 to 5 minute) with clever transitions and maybe some narration…that might be what it takes 🙂

And that only leaves the thorny question of what to call taking videos with a digital still camera behind the eyepiece of a spotting scope? Videoscoping is already in use for taking video from behind the eyepiece with a camcorder, but perhaps it can be expanded. For now I am just calling it Digiscoping Video.

In the meantime, while I will take the stills first, I am trying to train myself to hit the video switch on any bird that sits still long enough. It is just such fun!

Quick Dramatic Landscapes in Lightroom

HDR (high dynamic range) has captured the attention of many photographers these days, not always for the good of the art, imho, but there is little doubt the technique produces images with high drama. Most HDR work involves 3 or more exposures of the same scene, bracketed two or more stops, recorded as RAW files, and then processed in PhotoShop or dedicated software to capture the best tones from each exposure.

I shot jpeg, and, though I have experimented with what can be done in software wit 3 jpegs, I have developed a technique in Lightroom for quickly extracting maximum dynamic range and drama from a single file. I am certain that is is not a unique discovery on my part. Given the tools in Lightroom, others will have stumbled on the same technique. I have seen it on Moose Patterson’s twitter stream, for one, and I am sure a google search will turn up other instances, maybe quite a few.  However, since I  have already talked about this process in several posts in the past, and since it has become an essential tool in my photographic process, I thought a little video tutorial might be of interest.

So, here it is. You can view it here, but to see it to best effect it is best to view it through the link on YouTube, and to select the 720p (HD) option. Depending on your computer, you may have to pause it and let the video fully download before it will play smoothly.

Enjoy.

Playing with Panoramas: sort of…

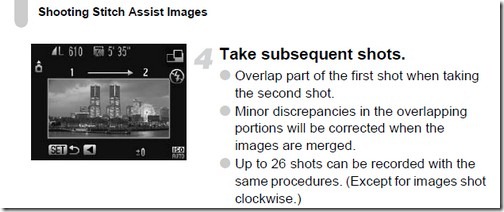
My new Canon SX20IS has an Easy Panorama mode…like the Sports mode or the Landscape mode, set on the main control dial. It displays your second shot next to the right edge of your first shot, so you and line them up before pressing the shutter…etc. etc. for as many shots as you want to string together. Canon also ships Photo Stitch software with the camera which automates the assembly of your images into one.

Stitch

From the Panorama instructions in the Canon manual. Note how you can overlap the 1st and 2nd images.

I have never quite gotten into Panoramas, primarily because I can not figure out how to view or display them effectively. I guess, if you had access to a continuous feed roll- or long sheet- inkjet printer, panorama sized prints would be possible. A little research around the web finds several services that will actually print at 20 inches x whatever at reasonable prices…so maybe the display part can be done, given a big enough wall.

At any rate, I was tempted by the Easy Panorama mode to experiment. I do not have a really panorama head, and I don’t generally carry a tipod anyway, so my experiments so far have hand held, or with the camera mounted on the end of my walking stick at best. The results were encouraging, from a technical standpoint, but not really good enough to make panoramas a part of my routine photographic day.

Until yesterday that is. Yesterday I was faced with a splendid view over blue water and a fringe of trees to an amazing sky, and on the near shore of the little pond, two white birch clumps just far enough apart to, in my minds eye, make a classic frame for the view. However, at 28mm (the widest reach of my zoom) and backed up so that one inch more would have put me over the embankment and into the marsh on the other side of the road from the pond, I could only get the outer fringe of branches on the birches on either side. Like this.

I fussed about at the edge of the road trying for better angles when it occurred to me that, while not a real panorama situation necessarily, here was a case where stitching two images together might catch what was in my mind’s eye much better than any single image I could take with the equipment at hand.

Okay. I set the lens to 28mm and tried two shots. If you have ever tried this you might guess at the problem. Your average P&S zoom has significant distortion at either end, and especially at the short end, and the distortion is worst at the edges of the frame. That made it next to impossible to line up the views from two images perfectly as the edge of one and the edge of the other fell across slightly different planes in the field of view…had slightly different distortion effects, and consequently, if you look at the image above, slightly different distances between, say, the horizon and the bottom of the first cloud up, or the horizon and the first small island down. It was impossible to line up clouds, horizon, and islands from any given position. Sigh. I took two shots for stitching anyway.

Then I thought about the problem. Distortion. Wide-angle distortion. Okay, so what if I set the lens to a longer focal length, with less obvious distortion, and took more images to cover the gap between the trees. I could not zoom in too close, since I wanted an impressive expanse of sky in the image as well, but at about 42mm equivalent I found an interesting compromise. It took three images to span birch clump to birch clump at 42mm…but digital is free, right? Snap, line up, snap, light up, snap.

One of the failings of the Photo Stitch software Canon provides is that it apparently just butts the images up against each other as best it can, without making any adjustments for white balance or exposure at the point of contact. In my first panorama experiments, you could see the lines, faintly, where the images overlapped. A reader of my Pic of the Day blog suggest a solution, but it must be applied in camera, and I had already taken these shots.

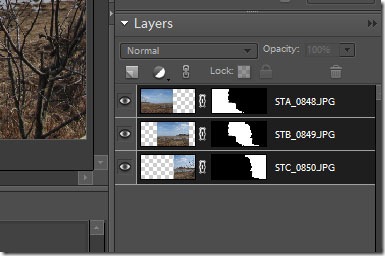
Because of the obvious limits of Photo Stitch, I had decided that I would try the PhotoMerge function in PhotoShop Elements for this set. Opening the first two files in PhoShoEl and applying the arrange only panorama option I was amazed a the seamless quality of the finished product. PhoShoEl is one smart program. Looking at the layers and the merge it created, it took an irregular cut of both images and put then together like a rather random jigsaw puzzle…and then, very evidently, applied some color balance and exposure analysis and adjusted the segments to match, all before it merged the files into one. Pretty good okay!

Merge

An example of the complex merge that PhotoMerge in PhotoShop Elements produces. Look at those layer masks!

It even managed to stretch or shrink portions of the edges of the two images to make the horizon, clouds, and islands line up. Amazing. If you click the image, it will open on my WideEyedInWonder (Smugmug) site so you can view it at the largest size you monitor will allow.

I am actually quite happy with this effort. I catches pretty well what I had hoped to catch…my mind’s-eye view.

So, what about the 42mm shots? Loading those into PhoShoEl and applying the same options in PhotoMerge produced this finished product.

And that is remarkably like what I envisioned! You will notice that it is even a bit wider then the merged 28mm views, but the perspective is so much different: So much more, to my eye, natural, that most people might not ever guess it is a panorama shot.

Finally, both stitched images were taken into Lightroom for final processing. Recovery for the sky, a touch of Fill Light, Blackpoint right, added Clarity and a bit of Vibrance. Sharpen landscape preset.

So, while I may not ever make panorama shooting part of my day-to-day photographic experience, per se, this is a technique that I have a feeling I will employ, on those not infrequent occasions when my mind’s eye view is wider than what my widest lens can capture.

Now if I can just clear a 24×44 inch space somewhere on some wall…

Rainy Day on Point Loma: learning.

My one free day in San Diego with a new camera to play with…or rather, a new camera to learn…turned out to be blessed with rain. Still, it was San Diego…I only get there once a year…and I have never yet been disappointed by a visit to  Cabrillo National Monument at the tip of Point Loma high above San Diego Harbor and the Pacific. The Monument’s hours are dictated by the fact that you have to drive through part of the naval base and the National Cemetery to reach it, and, with budget cutbacks, the military gates are only open 9-5. I drove the few miles from my hotel to the Monument in the rain, and arrived at the pay station just after it opened. It was drizzling then, and I hoped for dryer weather later in the day, so I took the turn down to the Tide Pools at the foot of the point on the Pacific side, accessible by the road that serves the modern Coast Guard station lighthouse down there, and the water treatment plant for the naval base.

I was dressed for the weather, and had a umbrella with me to shield the camera, so it seemed worth a walk from the parking lot down the short trail to the top of the cliffs overlooking the tide pools themselves. When I got to the cliff top I realized that the Monument must have come into some of the Economic Recovery Funds, since they had clearly been working on expanding the trail system back up and across the soft sandstone conglomerate and compacted soil cliffs and further back along the coast toward San Diego, giving me access to new views. Even in the rain, this proved too tempting to resist, and I spent a couple of happy hours there shooting the rain drenched cliffs from under my umbrella…the surf, the rocks, seaweed, pelicans and the green headlands further north.

Shooting in the rain, or near rain, is a challenge, not only because you need to keep today’s digital cameras dry, but because the lighting is so tricky. The sky can be surprisingly bright, especially when compared to the rain soaked foreground. If you are not careful you end up with the worst of both extremes: muddy, dark, indistinct foregrounds and white skies. Even within the clouds themselves, it does not take much thinning for the contrast range between dark heavy cloud and lighter cloud to exceed the range of most sensors.

Of course, Lighroom has the tools necessary to extend the apparent dynamic range of an image in post processing: Recovery for highlights, Fill Light for foreground and shadows, and Blackpoint adjustment to bring up the intensity of flat images…but there are limits to what can be done in post, even if shooting RAW, and certainly if, like me, you shoot JPEG.

Then too, one of the things I have learned about my new Canon SX20IS is that, in Programmed Auto mode,  it favors high shutter speeds and large apertures: more suitable for people (who are often in motion) than for stationary landscapes. The Canon seems to select even wider apertures than my Sony H’s did. This is not necessarily bad, as the lenses on these superzoom digitals are certainly optimized for wide apertures as well…but I am still traditional enough to be nervous shooting landscapes at F2.8.

The SX20 has a Landscape mode, but there is practically no information in the instructions as to what it actually does, beyond the obvious; “for capturing stunning landscapes.” Not helpful for anyone with photographic skills. Still, brief experimentation has taught me that it selects smaller apertures and slower shutter speeds and tends to favor lower ISOs. I am pretty sure…but not certain…that it also defaults to infinity focus when the auto focus fails to find a subject to lock on to, and it might adjust image contrast and saturation slightly too. Worth a try.

I am also gaining confidence in the SX20s iContrast setting, which is supposed to handle high dynamic range shots better than the conventional Program mode. I have experimented with intentionally biasing exposures toward the sky in tricky landscapes with clouds, using the Canon’s Exposure Lock, leaving the foreground darker than I would like it, and then adjusting in Lighroom (as I generally did when using the Sony, even with the Sony’s high dynamic range setting on)…but I am finding that using the iContrast or Landscape Program mode (which seems to have some of the same built in) and letting the Canon do its thing, actually gives me images that are, in fact, easier to adjust in Lightroom, and which require a lot less Fill Light for the foreground. If it is a choice between Recovery for highlights for Fill Light for shadows, I find that Recovery does less damage at the pixel level by introducing a lot less noise. Then too, if you are not careful with Fill Light, you can get halos at high contrast edges. Better, in high dynamic range situations, to work the sky, even using Lighroom’s Graduated Filter Effect at need, than to over-work the foreground.

Shooting in the rain or on a rainy day, it is really all about mood. You want to capture the wet saturation of the colors (using saturation in its photographic sense) without letting them go dark, and you want to catch the drama of the sky. In my opinion, you do not want the resulting images to look like they were taken on a brighter day…you want to preserve the feeling of wet and damp…the cool tones…and the feel of the soft heavy air, even in images with brighter colors.

After exploring the tail up the cliffs and further along the coast I came back to the tide pools and braved the slippery rock to climb down to the rocky shore. The tide was too far in for much tide pooling, and it was too dark anyway, but the wet seaweed on the beach offered some nice close-up and macro opportunities. The colors were richer than they might have been in full sun, and the wet provided interesting highlights.

Before leaving the Tide Pool area for the drive back up to the Visitor Center and original Lighthouse, I spent a few moments trying for Pelicans in flight as they road the inner line of surf down the coast toward me. With the SX20 at full reach (560mm equivalent) and on Sports Program, I got a few interesting shots.

Finally I did make it back to the car and drove up to the top of the Point Loma for the view. As things turned out, I had no more than got out of the car in the Visitor Center parking lot when it began to rain harder…and, though I attempted to wait it out in one of the Whale Watching shelters overlooking the Pacific, I finally had to decide that the rest of the day might be better spent back at the hotel processing my Tide Pool images.

I took this one last shot out over the Pacific just before the rain became too dense for photography.

So out of a rainy day at Cibrillo National Monument, I learned to trust Landscape mode a bit more, even if I don’t know exactly what it is doing, and how to enjoy and capture the mood of a stormy California day. Not bad.

Canon Powershot SX20IS: first thoughts

I have a new camera! After considerable research, I ordered a Canon Powershot SX20IS.

A new camera is always fun. It is almost like getting new eyes…or learning to see all over again. Of course, you carry your photographic habits and all you have learned about image making into the new experience…and comparisons with past cameras are inevitable…but really it is all about learning what this particular tool brings with it as potentials (that you many not have had with your old equipment, and that will open up the possibility of new images) and limitations (which you will have to learn to work around to get the images you like to take).

I have had the SX20IS just short of a week now, and had my first real chance to experience its potentials (and limitations) yesterday, on a perfect sunny winter day along the Maine coast around home. While it will take some getting used to, compared to the Sony H9 and H50 that I have used for 4 years now, I am already liking the Canon. I am liking it a lot!

The Sonys were great cameras. The combination of the flip out LCD which makes composing from any angle and any height easy, the super-macro setting which allows you to get in impossibly close, the wide zoom range which gives you an amazing flexibility in framing, and the overall quality of the images when creatively processed in Lightroom is hard to beat. And best of all, they were just a lot of fun to use. I enjoyed taking pictures with them, more, really, than I had ever enjoyed taking pictures with any camera before (and that is saying quite a bit!)…and, if you follow my Pic of the Day blog, you know that I got a lot of images that made me, at least, happy :).

Still, even the H50, which was better than the H9 (see my comparison), showed the limitations of the small sensor, despite then state-of-the-art internal image processing (fine detail loss due to aggressive noise reduction and high jpg compression ratios), and both showed noticeable color fringing in critical situations. I knew the limits and worked with them and around them, but I have kept my eye out for a camera that has all the strengths of the Sony H series and slightly better image quality.

The HX1, which replaced the H50 in the Sony lineup a year ago, and added several really nice features (HD video capture, auto panorama stitching, image stacking for extended contrast range in low light, etc.), unfortunately got consistently poor reviews for the one feature I really wanted: the consensus was that the image quality was no better than, and maybe a bit worse than, the H50. Not the direction I wanted to go.

And I knew I was probably looking for another super-zoom P&S, since nothing else was likely to have the feature set that made the Sonys so much fun to use, and I know that I am not ready to carry a full DSLR kit anyway.

When I got serious about shopping last month, I read a lot of reviews, and over time the conviction built that the Canon SX20IS might be worth a look. It has the flip out, rotating LCD that I require, both Macro and Super Macro settings, an even higher zoom range (20x, wider at 28mm equivalent, and longer at 560mm), and most people had good things to say about the image quality…even, surprisingly, at higher ISOs. Add in the 12mp sensor, 720 HD Video capture, a reportedly solid build, AA battery power, and SD card capture and how could I not order one to try.

So, after a grand total of about 300 images, what do I think?

Great camera!

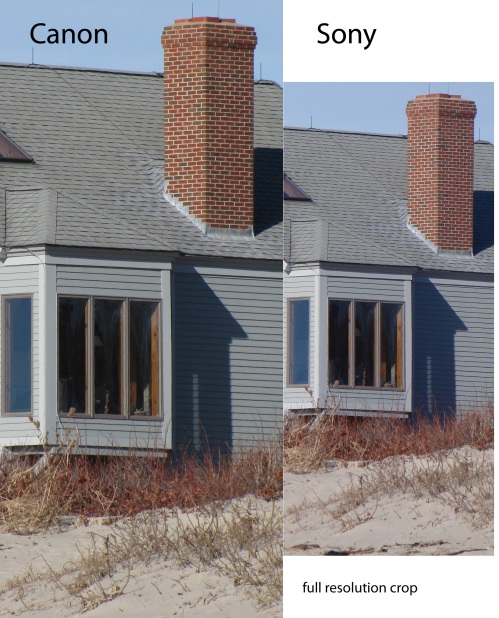
The major consideration right now is, as above, image quality, and side-by-side comparison shots with the H50 and the Canon SX20IS clearly show that the Canon has less detail blurring, which amounts (perhaps along with the higher pixel density) to an overall increase in fine detail. The Canon images also show slightly more saturation out-of-camera, and lower noise overall. The Sony shots, processed as well as I could manage in Lightroom, always looked just a bit rendered…like a close approximation of reality, but just slightly painted. The Canon produces images that are more photographic somehow. It is a subtle difference but it is, to my eye at least, a real difference. And, while it is most obvious at larger sizes when viewed on the computer…it is evident even at normal screen resolutions. Again, at least to my eye.

Take a look at these two comparison shots of one of my favorite test subjects: Nubble Light in Cape Neddick ME. First the Sony. You can view the file at full resolution by clicking the pic and then choosing O (original)  at the top of the screen on WideEyeInWonder. Then the Canon. Again, view at original size. Both images were processed in Lightroom to the best of my ability. Given slight differences in scale and considerable differences in lighting, these two images serve to point up the differences I see.

Look at the rocks in the foreground. Notice that in the Sony image the rocks look like a really good water color painting of rocks, while in the Canon shot they retain their full gnarly rockness. Notice the vertical siding on the low connecting shed between the house and the base of the Lighthouse. Neither image is perfect at full resolution, but I find the Canon image to to be closer to reality. And again, you do not have to blow the images up to full resolution to see the differences. It is evident even in the two small images in the column here…in comparison, and once you know what to look for.

The most telling remark anyone ever made about one of my Sony pics was my daughter Emily, home from College. She looked at the Nubble Light shot above, printed at 8×11, mounted, framed, and hung and said “That’s a painting right? It’s not a photograph.” There you go. I hope not to have that feeling about prints from the Canon SX20IS.

This is an excellent test for chromatic aberration too. Note that in the Canon shot you have to go all the way out the window of the shed on the left to see any at all, and then you have to look for it, while in the Sony shot it is evident along the edge of the gray door and the window in the connecting shed near the center of the image.

I should remind you that I was perfectly happy with the Sony images for two years, and would be still be satisfied with them for almost any purpose short of magazine publication. The Canon SX20IS is just a bit better.

Limited test shots at higher ISOs are encouraging so far. ISO 100 is excellent. 200 is just about as good. 400 begins to show noise but nothing you would see without enlargement. 800 is acceptable and 1600 is not much worse. Even the special 3200 low light mode produces images that would be fine viewed at reasonable sizes on a computer screen or printed up to 4×6, at the cost of limiting resolution to 6mp. What this means, in effect, is that I might be able to use Auto ISO more often, and let the camera choose slightly higher ISOs in low light situations. I always kept the Sonys set to ISO 100. Here are full resolution crops: 400ISO, 800ISO and 3200ISO. Click to enlarge.

400ISO 800ISO 3200ISO

As to my basic requirements: articulated LCD, macro, and wide zoom range: the Canon works as advertised. The LDC flips out to the side and rotates, and though not as large or as fine resolution as the Sony, it works well and is visible even in bright sun. In addition, it folds closed with the panel facing the camera and fully protected.

The 28mm wide on the Canon adds significant field of view, and the 560mm tele has just that much more reach. Distortions seem minimal throughout the zoom range (or at least no worse than could be expected in a zoom this long). Though some reviewers have mentioned noticeable color fringing (chromatic aberration and purple sensor fringe) very few of my shots at any focal length have shown any at all, and what was there in one or two shots was easily corrected in Lightroom. Certainly the Canon shows less color aberration than either of the Sony Hs.

Macro works differently on the Canon than on the Sony. I used to just leave the Sonys in Macro all the time and they would focus from 2 cm out. You could leave the Canon in regular Macro and have focus from 4 inches out at the wide end of the zoom to 3.2 feet at the tele end, but for closer work you need to switch to Super Macro, which is only available at the wide end. I can live with this, especially as the Canon macro images are spectacular. Even at 3.2 feet and 560mm equivalent, you get a very nice macro look, and great bokeh.

I liked the Sonys’ easy access to ISO, EV compensation, and Program Shift…all of which I use fairly frequently, through the selections along the base of the displays and the function wheel. The Canon goes one better with dedicated buttons for ISO and EV compensation, and user programmed button that I will use for Program Shift. There is also a dedicated button for shifting the focus point in Programmed mode. All of this will take getting used to, but is actually easier and faster than shifting the functions on the Sony.

The camera is indeed solidly built, especially compared to the Sonys. This is a real camera, and, though not much bigger than the H50, weighs several ounces more. The AA batteries are part of that, but not all. The H50’s zoom, for instance, had a bit of wobble as it extended. The Canon is rock solid and smooth. The whole camera just feels substantial.

The only disappointment so far is that neither the LCD panel, as mentioned above, or the EV is as high resolution or as easy to look at as the Sonys’. You could really evaluate an image on the LCD of the Sony…on the Canon you have to depend much more on the histogram.

A nice touch is that you can select to view the histogram and all pertinent exposure data as part of the review process, along with a medium sized thumbnail of the image.

The SX20IS has an optically stabilized lens…but so far I have not found it to be quite as effective as the moving sensor stabilization in the Sonys. More care is called for in long exposure shots. Of course, maybe I am pushing the limits at this point…being, you might say, just a bit testy with the new tool…exploring the limits.

I am still discovering many of the smaller niceties of the SX20: the display is all kinds of customizable, and has the same composition grid available that I came to appreciate on the Sonys; it has a number of interesting looking scene modes which I intend to explore more; and it has HD Video capture and HDMI output.

I plan on trying the Video feature more extensively over the next few weeks, but one great feature that is not available in some competing cameras is the ability to zoom while capturing Video…and the ability to capture full resolution stills while shooting Video. I really like the dedicated record button that allows you to shoot video at any time, even if the control dial is not set to video capture.

So. So far so good. So far the Canon Powershot SX20IS is all I had hoped it would be and more. I like it! It it lives up to its early potential, I am not going to have any problem keeping up my Pic of the Day blog.

Shooting Snow!

Among the hardest scenes for the landscape photographer to capture, snow has to rank right up there at the top. In sunlight, a snow covered landscape exceeds the light sensitivity range of our eyes…let alone a digital camera sensor. Even in lower light levels, under overcast skies or while it is actually snowing, it is very difficult to balance exposure in camera to produce white snow with significant texture and detail, and true to life colors where color is showing. If the snow is right, everything else in the scene is dark gray to black…which is one reason so may photographers resort to black and white when shooting snow scenes.

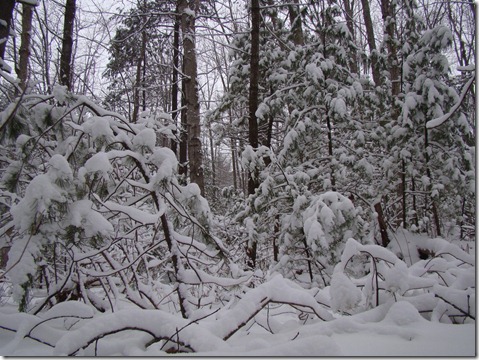
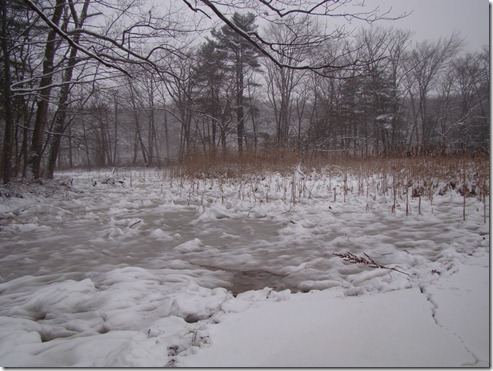
Over the New Year’s holiday we got significant amounts of fresh snow here in southern Maine, so, of course, I was out with my camera. That first day I was out while it was actually snowing. Light levels were subdued,the sky was a dark grey blur,  and there was a lot of snow still in the air, closing horizons like fog. I was out a few hours and had a chance to reflect on the process of capturing a snowy landscape.

In subdued light, without any direct sun, I find that my camera responds best if I simply leave it on Programmed Auto. This produces a balanced exposure with enough detail in the snow so that I can bring it down and out in Lightroom, and enough color in whatever is still showing color so that I can bring it up and out.

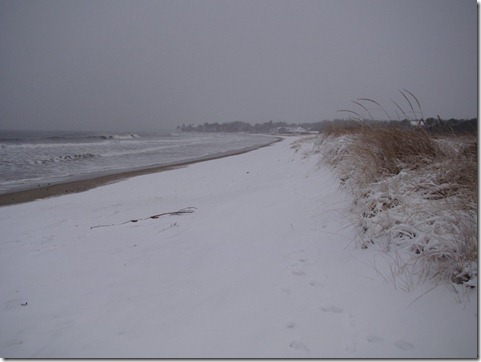
Here is a shot, just as it came from the camera (just resized for display here).

blizzard00001

As you can see, the snow is kind of gray, and there is little to no color in the beach grasses.

A trip through Lightroom results in this image.

I applied Recovery to bring out what little detail is in the snow and sky, then Fill Light for the color. The Blackpoint is shifted right, and I added Clarity (local contrast) and Vibrance (selective saturation) and finally used the Sharpen Landscape preset. I increased Contrast overall just slightly.

This image is very close to my visual impression of the scene when taken.

Here is another, somewhat classic shot.

blizzard00002

In camera exposure is not very spectacular…but the information is all there for post-processing.

Using almost exactly the same processing in Lightroom as the first image I was able to preserve the snow detail while bringing out the color in the evergreens.

One more from the subdued light series.

blizzard00004

The differences here are more subtle but there is an increase in both snow detail and color.

The key here is that I am working with a balanced exposure, as provided by the auto exposure system in the camera, with no manipulation, then doing all my adjustments in post-processing. Of course this is only possible if you know both how your camera is going to respond to these kinds of scenes and what you are able to do in software afterwards. Both in camera exposure and post-processing are part of the creative process, and part of the envisioning of the image when it is being taken.

I can’t emphasize that enough. What you are going to be able to do in post has to be part of your exposure decision in camera.

Of course, eventually the sun does come out. It might be days later, as it was in Maine, but the sun completely transforms the exposure issue for snow covered landscape.

Most people require sunglasses to deal with sun on snow. I use a wide brimmed hat. Whatever it takes, even our unprotected eyes can be overwhelmed by the glare of light when the sun shines on snow.

If your eyes can’t handle it, there is absolutely no chance the digital sensor in our cameras can. With sun on show you really have no good choices. Either you expose for the sky and any color in the scene, and the snow goes completely white and featureless, or you expose for the snow, and everything else goes black. Even if you expose for the snow, you run the risk of getting grey snow with very few highlights, and that does not look real either. No good choices.

The usual way of dealing with snow and sun is to use Exposure Compensation. Most digital cameras, when placed in Programmed Auto mode, will allow you to shift the EV (Exposure Value) up or down by 2 points. Each 1 EV change is equivalent to doubling or halving the exposure. Some cameras have a dedicated button for this, or an easy to find menu option. Some have it buried in the menu system…though it is generally fairly near the top since it is often used.

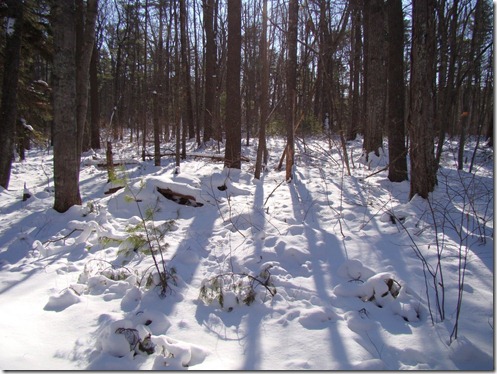
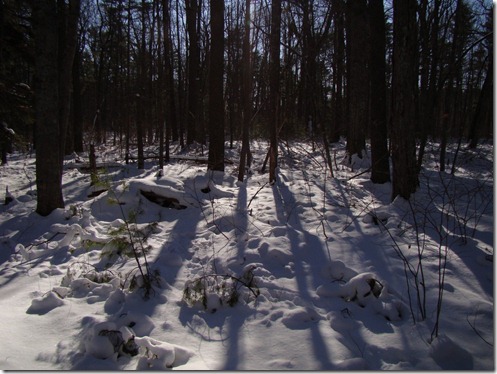
Conventional exposure wisdom says that for sunny snow covered landscape or sun on snow details you should reduce the exposure by –.7 to –1 EV. Here are two examples of the difference that makes. Standard Programmed auto shot first then –.7EV.

Image00001

Image00002

As you see, standard Programmed Auto produces large areas of snow that is totally burned out…so white there is no detail left. It does, however, keep the dark areas in the scene reasonably exposed. Dialing down the EV to –.7 keeps more detail in the sunniest areas of snow, but casts everything else, including shadows on the snow, way too dark.

That’s okay though…we are not looking at these as finished exposures, but as starting points for post processing. The question is, with proper processing which will capture more of the detail of the natural scene?

DSC08636

This the first programmed auto image processed in Lightroom. I used heavy Recovery for the snow highlights, a touch of Fill Light for the shadows, blackpoint just to the right, added Clarity and Vibrance and Sharpen Landscape preset.

Here is the –.7 EV image processed.

Much less Recovery, though still some. Much more Fill Light for the shadows, and consequently blackpoint further right. Added Clarity and Vibrance and Sharpen Landscapes. Because the shadows are darker the blue cast common in sun on snow shots was much more pronounced in this image, so I used the selective saturation tool to desaturate just the blue of the shadows.

Which is closer to a naked eye view? Which is a better image? I prefer the second shot which started with –.7EV.

On the other hand, there is the theory that conentional auto exposure of sun on show sets the exposure too low…for the snow…and everything else goes dark while the snow looses it whiteness. This is especially true in shots of people against snow backgrounds in full sun. Here are two shots, one at 0EV and one at +.7EV

.Image00008

Image00009

As you see, the snow is white in the +EV shot and the trees look more natural. However, with processing in Lightroom, the 0EV shot (darker) still yielded the more satisfying image.

Here is an extreme.

I shot this close up of an area of intense sun on snow at –.7EV.

Image00003

Way too dark.

Processing in Lightroom, plus a little cropping, (with a good deal of desaturation of the blue shadows) gives us this.

In general I had more success processing –.7EV shots on this sunny day than I did with standard Programmed auto shots. I did not like the +EV shots.

So, what do you do if your camera does not have EV Exposure Compensation settings? Some don’t. Most do however have Scene Mode…and one of the Modes included is almost certainly Snow or Sand & Snow.

However, these Modes are based on the assumption that you are taking images of people against a snowy backdrop…they increase exposure, generally by .5 to 1EV. And that is good. For people shots or if your primary interest is objects in the foreground. For Snowy Landscapes, however, it might just be counterproductive…especially if you consider the in-camera exposure as only a starting point for post-processing. If, on the other hand, you are not going to post-process, the Snow Mode may indeed give you more satisfactory snow scenes.

Take these two shots right from the camera. The first is conventional Programmed auto and the second is Snow Mode.

Snow00006

Snow00005The second shot looks a bit more natural to me.

Again.

Snow00003 

and

Snow00004

If I were processing these…the first in each case would make the better image, given the tools I have in Lightroom. If using them direct from the camera, however, there is no doubt that the Snow Mode does its job and produces a better snow image.

So. Let it snow. Let it show. Shoot the snow.

Just know what your camera is capable of, and what you are able to do in whatever post processing program you prefer. Expose in camera for best post.

Let it snow. Shoot snowy landscapes!

A Year of Pics and Places

Happy New Year!

A journey through my past year via the pictures and the places. What a blessing it has been, beginning to end! I can only praise my God, for God is God and God is good.

Each thumbnail is linked back to the gallery it came from on WideEyedInWonder.  This is not a best of, by any means. Just a key to the places and the pics. To remember. To celebrate. To enjoy.

Jan

Parson's Beach, Kennebunk ME, New Year's Day Sunset 2007

Kennebunk ME

Ding Darling National Wildlife Refuge, Sanibel Island, FL 2009

Sanibel Island FL

Merritt Island National Wildlife Refuge, Black Point Drive, Titusville FL 1/2009

Merritt Island FL

Feb

Sonoma CA

DSC05303
Albuquerque NM

Snowy Day February, Parson's Beach, Kennebunk ME
Kennebunk ME

March

San Diego, CA 2009 Sunset Cliffs and Cabrillo NM.
San Diego CA

L S de Elcano, Spanish Royal Navy training ship. 3rd largest Tall Ship.
Galveston TX

Parson's Beach, Kennebunk, ME 3/2009
Kennebunk ME

April

Alligator Farm, St. Augustine FL
St. Augustine FL

St. Augustine FL
St. Augustine FL

Rachel Carson NWR, Wells ME 4/2009

Wells ME

May

Enduring the Rain: Central Park, The Boathouse and the Ramble, NYC
NYC

Saco Heath, Saco ME 5/2009
Saco Heath ME

Parson's Beach, Kennebunk ME 5/2009

Kennebunk ME

June

Chase Lake NWR, ND 6/2009
Jamestown ND

Mount Desert Island, ME, 6/2009
Acadia NP ME

Fernald Brook, Kennebunk, ME 6/2009
Kennebunk ME

July


Kennebunkport ME

Coastal Maine Botanical Gardens, Boothbay Harbor, ME 7/2009
Coastal ME Botanical Gardens

Coastal Maine Botanical Gardens, Boothbay Harbor, ME 7/2009
Costal ME Botanical Gardens

Aug

DSC07603
Rutland Water UK

Rachel Carson NWR, Wells, ME 8/2009
Rachel Carson NWR ME

Kennebunk ME, Rose
Kennebunk ME

Sept

Portland Head Light, September 2009
Portland Head Light ME

Lakeside OH, 2009
Lakeside OH

DSC07848
Point Lobos CA

Oct

DSC07902
Kennebunk ME

DSC07922
Jekyll Island GA

Z1000067
Green Kay FL

Nov

DSC07977
Cape May NJ

DSC08095
Kennebunk ME

 DSC08213
Wetzlar Germany

Dec

DSC08293

Kennebunk ME

Desert Botanical Gardens, Phoenix AZ, 12/09
Phoenix AZ

DSC08340
Kennebunkport ME

May your New Year be blessed, with places and images you will always remember.

Your Zoom is for Framing!

This is another in the series of pieces that began with The Photogenic Moment, and continued with It’s all about Patterns.

The vast majority of digital cameras sold today are sold with a zoom lens. Your average entry level Point and Shoot will have a 3x zoom. 4 and 5x zooms are becoming the norm for anything above entry level. The top of the line P&Ss come with 15-20x zooms today: the equivalent of a true wide angle to a fairly long telephoto lens on an old fashioned 35mm film camera (witch still sets the standard by which we judge relative focal lengths and fields of view) or a full frame DSLR: that is equivalent to a 28mm to over 500mm lens. Even entry level DSLRs come with a kit lens that is generally a moderate wide to moderate tel zoom (35mm-105mm).

Most beginning photographers (and many advanced ones, if truth were told) think of the zoom as means of fitting in more of the room or more faces inside, or taking in the majestic sweep of a landscape outside, at the wide end, and then being able to zoom up to high power to bring distant things close, outside, or to fill the frame with a single face out of the crowd inside. They think close or far: zoom out, zoom in.

And, once more, if truth were told, most photographers use their zooms either at the full wide end, or the full telephoto, wishing for more at either end…and rarely anywhere in between.

In reality though, as you grow as a photographer, you will realize that the main function of the zoom on your camera is simply to control the size of the frame you are filling with image. A big frame, as in a group shot or wide landscape, is at the wide angle end of the zoom. A small frame, as in a portrait or a more intimate landscape, if found at the telephoto end of the zoom. And there are an infinite range of frame sizes in between, each appropriate for some image.

You could grow a lot as a photographer by making a commitment to yourself to use the full range of your zoom…to take images at every possible setting.

Here is a classic case. All examples here are from the Sony DSC H50 with a 15x zoom: 31mm to 465mm equivalent.

A wide angle shot (31mm equivalent), cropped from the bottom to look even wider, and…

A telephoto shot taken at the about 70mm equivalent from the same position. I did not use the zoom to bring the trees closer. I used it to adjust the size of the frame within which the trees appear.

Or another pair from the same day.

Framed at about 70mm equivalent.

Framed at about 250mm equivalent from the same spot, and cropped from the bottom and top to make it look wider.

Or take this pair:

At full wide (31mm equivalent) and then…

this, taken at about 300mm equivalent from the same spot…framing just a segment of the foam in the shot above.

Of course, this is not a question of right or wrong…good zoom or bad zoom. I am consciously using the zoom on the camera to adjust the size of my frame. What I fill it with, once it is adjusted, is another matter (see It is all about patterns… ).

In this shot, I used the camera zoom, at about 250mm equivalent, to isolate (frame) just a portion of the cactus…the part I was interested in. I could have accomplished the same thing by moving closer to the cactus, of course, but, hay, that’s what the zoom is for!

Here is a sequence of three shots, all taken from the same spot, with different zoom settings, for dramatically different effects.

By using the zoom to alter the size of the frame, I am able to create everything from landscape to abstract, without moving a step.

For the following shot I wanted to emphasize the Rhodora at the foot of the trees. Zooming in to 180mm equivalent allowed me to frame shot so that there is a balance between the flowering shrubs and the trees.

Or, again, two shots from the same position with very different zoom settings: full telephoto at 465mm equivalent, and full wide at 31mm equivalent.

Chances are very good you have zoom on your P&S camera. Think of it as a framing tool…the means by which you control the size of the frame you fill with your image…then use it…use every setting. Experiment with all the different size frames you might apply on any scene, from any single location.

Your images will be the better for it.